DIY Wall Shelves: Gorgeous Acrylic Shelves on Walls or in Windows
Accept y'all ever thought to yourself, "It would be nice if I could hang a shelf or two in the window. All that natural light!" Or: "I need more acrylic in my life. Shelves? Could I make acrylic shelves?" Hither'southward some good news: You can DIY wall shelves, made out of acrylic, and hang them on the wall OR in the window. Such a classy, modern expect in either state of affairs. In this tutorial, we'll evidence you how to make them and hang them in the window, although yous could easily switch the subclass direction for a simple wall installation.
 View in gallery
  View in gallery
 Materials Needed:
- 3/4" acrylic sheeting, cutting to size
- Right-angle brackets (four per shelf)
- Screws
- Gold spray paint
- Level, drill, and diverse sizes of drill bits
 View in gallery
 To begin, you lot need to mark on the acrylic protection paper where you will drill the holes for your brackets. For wall installation, attach the brackets in conjunction with the placement of studs in your wall frame. For window installation, attach ii brackets on each end of your shelf.
 View in gallery
 Marking these conspicuously and accurately. Acrylic is less forgiving than wood when information technology comes to drilling, so you want to be certain to striking the right spot with your drill bit the first time.
 View in gallery
 When you're done mark all the holes you'll need with your brackets, ready them carefully in a well-ventilated area on superlative of a drop fabric. Lightly coat the brackets with gold spray paint.
 View in gallery
 Identify the screws (be sure they are shorter than the thickness of your acrylic) on a paper plate, and lightly spray them equally well. This will ensure that the screw heads are the aforementioned color as the brackets when you go to install them.
 View in gallery
 You will demand to use iii sizes of drill $.25 to create the correct size of hole for your bracket screws. Beginning pretty minor, then cull the drill bit that matches the screw exactly, then choose one drill bit in between them.
 View in gallery
 Starting with a small drill bit, drill precisely perpendicular through the center of your hole mark. Also, use a steady hand and don't allow the drill bit "catch and pull" into the acrylic. Always be ready to pull the drill bit backward out of the hole if information technology starts to grab.
 View in gallery
 Take intendance not to drill all the way through your acrylic shelf, or y'all will take holes in the top of your shelf subsequently installation. Think, too, that the original drill bit will exist quite a bit smaller than the actual screw size to attach the brackets.
 View in gallery
 Motion upwardly 2 or three sizes in drill chip, and drill into the aforementioned holes, making the diameter slightly bitter with the bigger drill flake. Acrylic is decumbent to cracking if yous try to make a large hole out of the blue; notwithstanding, it will form beautifully when you grow the pigsty incrementally.
 View in gallery
 Tip: To ensure that you don't get all the manner through the acrylic, measure the tip of your drill bit to be just shorter than the thickness of your acrylic, and place a piece of record on the drill bit then the border of the tape marks the maximum depth you can drill.
 View in gallery
 The acrylic and drill bit can go pretty hot when you drill. Be sure to remove the drill bit ofttimes during drilling, and get the acrylic shavings off the drill bit so it maximizes the drilling effectiveness. Repeat for the largest drill bit.
 View in gallery
 At this bespeak, you lot should have all the holes drilled in through the underside of your DIY wall shelves, and they should be the verbal size for your bracket screws.
 View in gallery
 The top side of your shelves volition look untouched (hopefully?).
 View in gallery
 With the holes drilled into your acrylic, information technology's time to remove the protective cover on the underside (drilled) side of the acrylic shelves.
 View in gallery
 Attach the brackets (when they are thoroughly dry) with the gold screws.
 View in gallery
 As you can see in this, spray painting the threads of the screws didn't alter much as far as golden coloring goes. But it makes a difference with the head colour next to the bracket.
 View in gallery
 With the brackets attached to your DIY wall shelves, it's time to mount the to the wall (or the window). Place them in your desired location, and so ensure level.
 View in gallery
 Once they are level, mountain your acrylic shelves with two-1/2" forest screws (gold head preferred; paint them if you need).
 View in gallery
 At this point, you can remove the protective covering on the top of your acrylic shelves.
 View in gallery
 Aren't they gorgeous?
 View in gallery
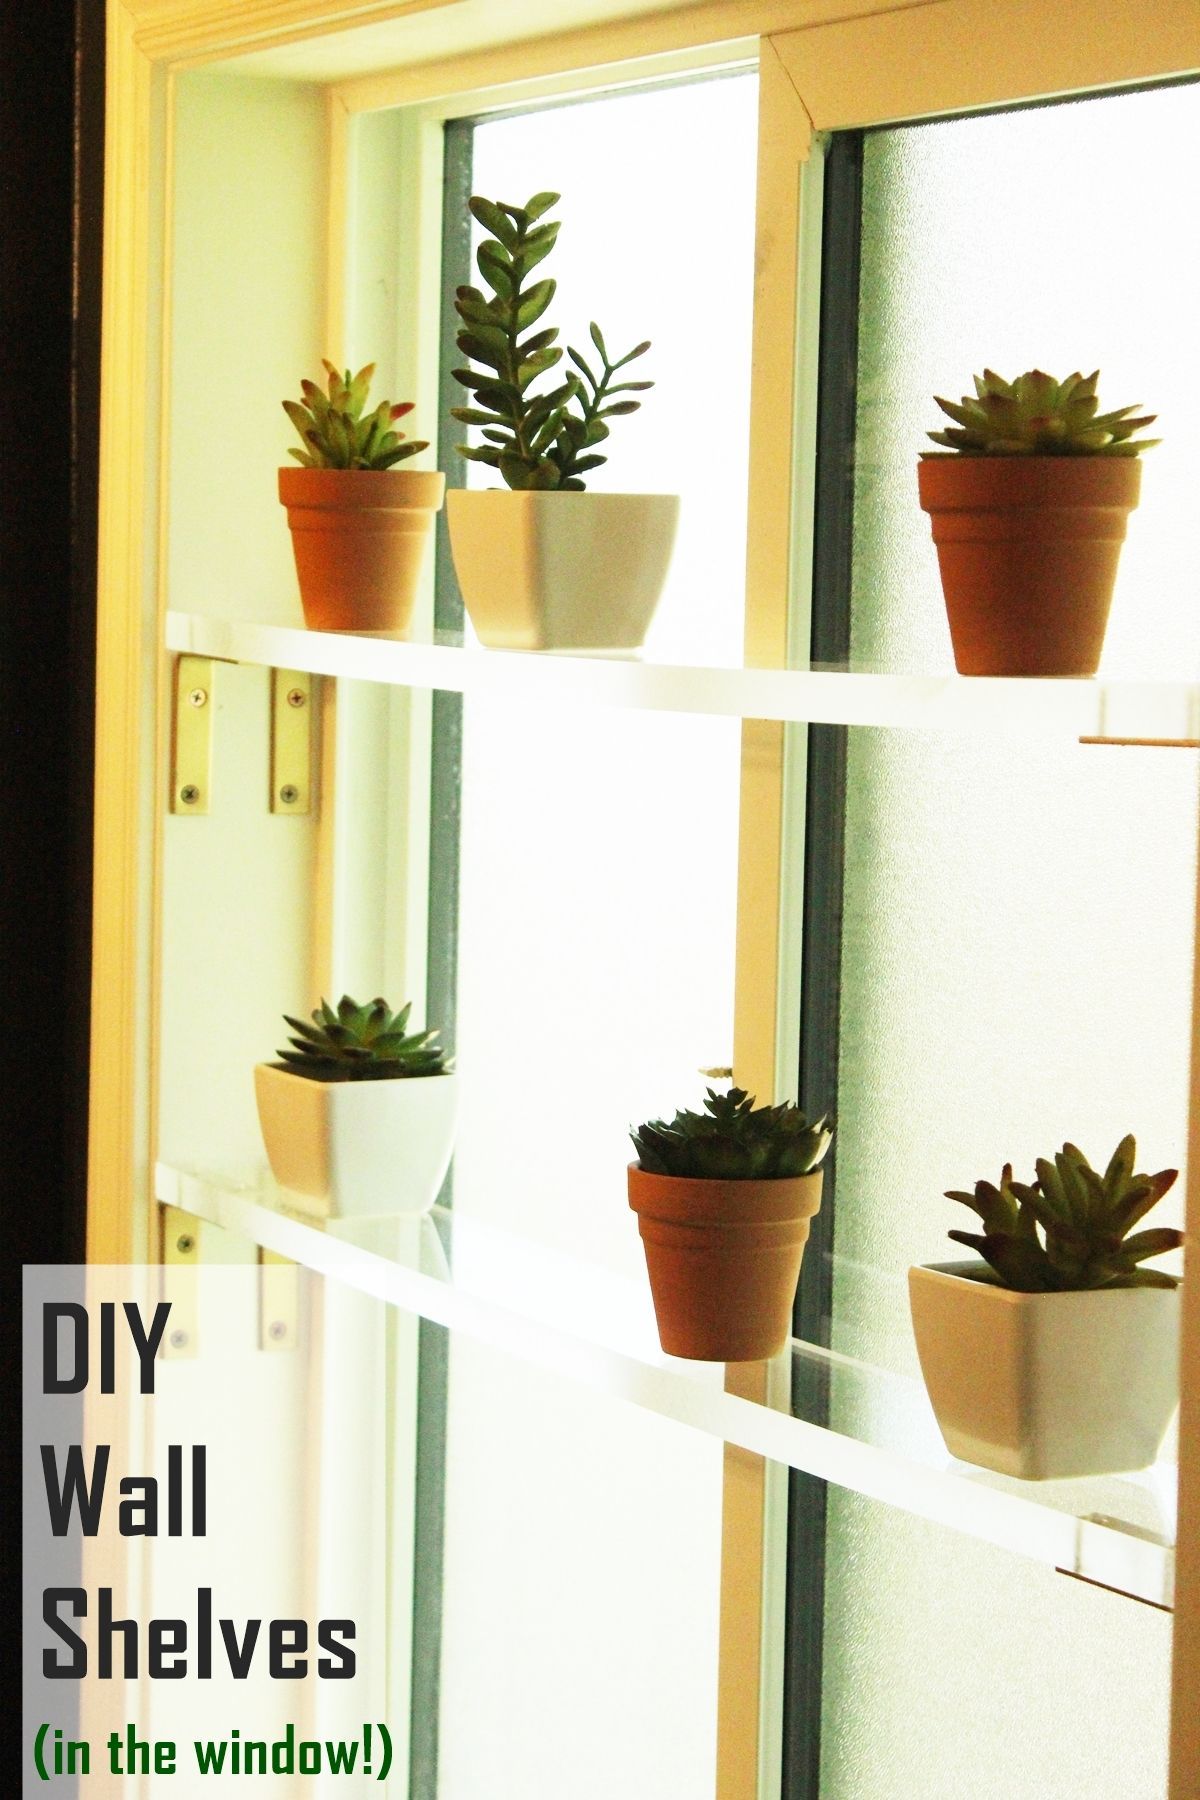
 Here's a glimpse of your acrylic shelves in the window. They would expect swell as wall shelves as well, of course. Because clear.
 View in gallery
 One benefit of having acrylic shelves in the window is the abundance of natural light and the opportunity for constitute life.
 View in gallery
 Being articulate and transparent, acrylic shelves in the window maintain that visually lightweight look in a chic, modern way.
 View in gallery
 Go on the shelf décor minimal to let the shelves smoothen. When yous order your custom-cut acrylic shelves, you tin opt for a polished side border. It is quite expensive, though, and so exist prepared to double or triple the cost of your acrylic if yous choose to polish the edges.
 View in gallery
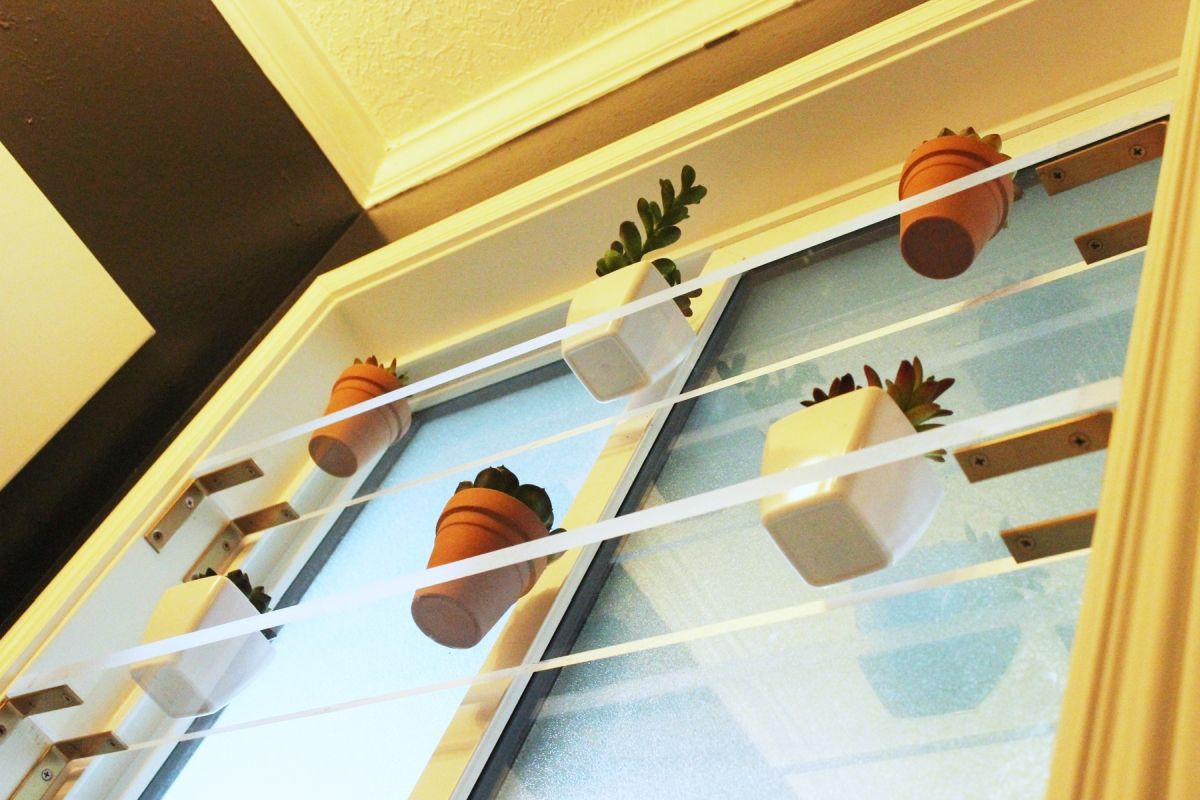
 This example did not smooth the edges of the acrylic shelves, then they are slightly opaque. Polishing would expect lovely, of course, but nosotros are perfectly happy with this await as well.
 View in gallery
 When the lesser of your DIY wall shelves looks as beautiful every bit the front and top, you know you've stumbled upon a good thing.
 View in gallery
 We hope yous enjoy this contemporary twist on DIY wall shelves, by using acrylic sheeting as a unique shelving material. Happy DIYing!
Source: https://www.homedit.com/acrylic-shelves/
0 Response to "DIY Wall Shelves: Gorgeous Acrylic Shelves on Walls or in Windows"
Post a Comment